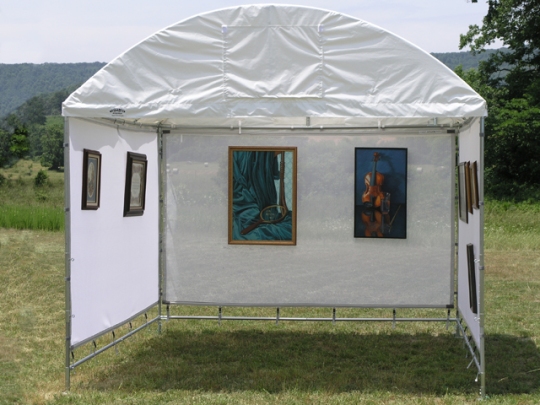
The Frugal way to start showing at Art Festivals: The Panels
OK, so we have our EZ up Tent ordered and even with WWW. WINDYKAI.COM on the awning all for under $250 compared to the expensive brand at well over $800
So now how do we display my art. The big expensive, and very high quality way to go is through a company called Pro-panels. They are beautiful, sturdy and extremely expensive for this little girl right now. Here’s a good look at how nice they are. And maybe one day I too will be able to afford the best..just not now….
This particular panel runs
-
30″ wide $105
-
38.5″ wide $120
It would take about 8 of these to complete a 10×10 tent equaling around $960….well, I don’t have an extra thousand dollars lying around just yet…like I said, one day.
BUT FOR NOW….here are some extremely easy, non expensive and attractive alternatives.
 This gentleman used concrete support wire to hang his work on. I would imagine this is a very cheap option at Home Depot.
 This tent used all pegboard that runs about 6 dollars for a 4 foot sheet.
 These Wire Mesh Panels are another option but run around $3-400 So I’ve decided to go with the next best thing….
 SINGLE WIRE MESH PANELS…at Home Depot sold as Closet organizers for $10 for a foot and half panel leaving me to need around nine for a 10 x 10 tent costing less than $100. We saw several booths at a recent show with these and they look fantastic. $90 compared to $900…I”m pretty proud of myself…now are they pro panels…no…but for right now on our budget they will do just fine and look very nice until we decide to invest more. Or, as many of the artists I spoke with at this recent festival, they love their mesh panels and wouldn’t have anything else. So who knows?
Now for the center to hide the back doorway my handy dandy husband is going to building a little something like this….
With pegboard and S hooks you can do an awful lot and at $6 a sheet and some 2×2 boards along with some very pretty trim I found at home depot meant for home floor or ceiling trim we have a very nice looking, foldable, inexpensive and very versatile additions to our tent.
So I’ve been thinking, how am I going to pull these wire mesh panels and this peg-board wall into a booth that will draw people in…well I have the perfect idea and it goes with all the things I love and adore….All things Old…so you’ll have to wait until next time to hear how we’ll pull the decor together along with lighting and much more.
Thanks as always for reading, you are so special to me and to share the process with you is extremely cathartic and is helping me get ready in my head and get organized in the reality. Our tent is ordered and shipped, when it arrives and we practice putting it up I’ll let you know the hilarity that will no doubt ensue.
Until then don’t forget to comment, share on Facebook or click Like.
Peace and Light to you…Windy Kai


 “I’ve been doing shows for 25 years in every part of the country and in all kinds of conditions. Here’s a list of supplies I always bring with me, besides of course my inventory, charge card machine, plenty of change, extra pens, and my display. I hope with this basic kit you’ll be able to meet whatever challenges come your way.”


