Hummingbird Studios: Mixed Media Fine Art mixed with the Fine Art of Life…

Posts tagged ‘Home Depot’

Great Show and New Frugal Tips!

Hi all,  I just returned from a great little show in Georgetown TX and had a super time!

Made some great sales but most of all I got some great tips from a New Artist that was only on his second show!  So it just goes to show that we can always learn and share (or steal) 🙂  ideas from each other no matter how long we’ve been at this game!

____________________________________________

First of all Jim at www.jshepardstudios.com showed me http://www.qrstuff.com/  The newest gadget app that’s hitting the “phone world”  You can create a code for your own website so that buyers with the QR App downloaded to their phone can scan the code and it will take them directly to your website!  There’s also much more you can do if you explore the site!

So download a FREE QR Reader App on your phone and scan the code below:

IT WILL TAKE YOU DIRECTLY TO MY WEBSITE!

What a great tool to have on display at your booth so folks don’t have to remember your site….they can go directly to it!  It’s the new “wave” and you’ll start seeing these codes everywhere, if you haven’t already.  So jump on in and create your own code for your buyers, for FREE!

_______________________________________________

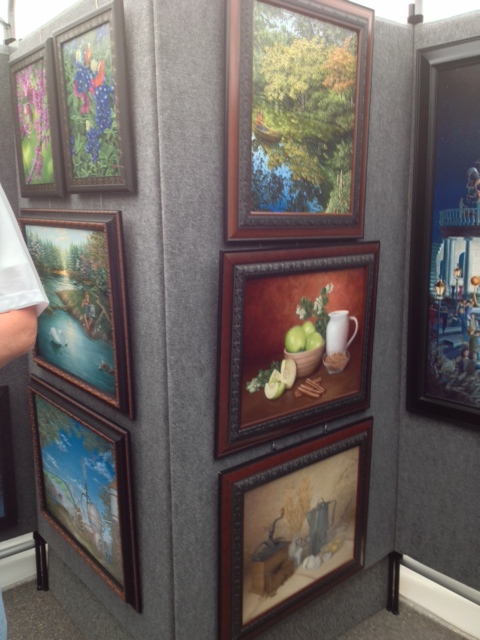
Finally Jim had a great storage idea that he used in his tent.  He had his pro-panels set up as below…..

But secretly behind it he had created a bin for storage using only cardboard and matching carpet from Home Depot to hide the “junk” from view of buyers.  See Below….

WHAT A GREAT IDEA JIM!  THANKS!!

So all in all with sales, time with my husband, meeting new people like Jim and getting these great frugal ideas, it was a super successful weekend!

_____________________________________

If you’d like to see us in person we’ll be at the following locations coming up in October and November!

Show Dates: 10/26/12 – 10/28/12

Hope to see you there!!

Don’t forget to visit me on Facebook and Like Hummingbird Studios Page and follow us on Twitter OR sign up for our newsletter to your right. You’ll get a free transfer technique and Monthly updates and tutorials from Hummingbird Studios.

Love and Light as Always…..WK

Vintage papers and how I use them in my work….plus some great new finds at Home Depot!

Hello to you and happy Super Bowl Day!!

Yes it’s a holiday around our house!!

I finished a piece last night with some amazing vintage papers that I found at a toy train show of all places!  My husband is a huge toy train fan and I love to go and enjoy with him. Fortunate for me, always looking for vintage items, I lucked upon a vendor that was selling all kinds of maps, records and various train memorabilia for very inexpensive prices!  I found an entire accounting ledger full of handwriting dated in the 1950’s…..it’s amazing and to most people it’s just an old book that’s been written in, but the writing is my favorite part.  Imagine over 60 years ago an accountant and engineer for a train company diligently wrote down expenses and income, thinking it was a mere form of record for himself and his business…..I wonder what he would think now knowing it has become part of my art?  Would he think I’m crazy?  Would he be thrilled?  Wherever he or she is now, they are now a part of me and I find that so moving and the connection so powerful that I have a difficult time putting it into words…..Their energy is now a part of my work and find it a fascinating aspect of my job…if you can call it a job!!

Here’s the book and an example of a page….

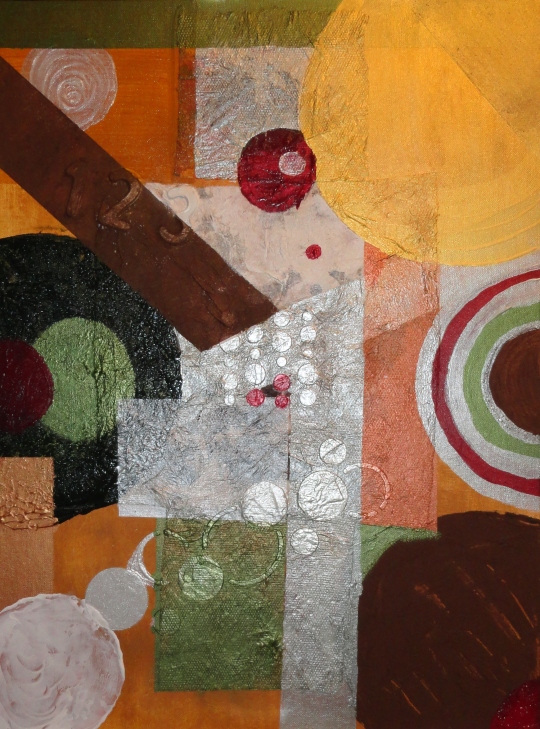
                                Below is the piece I worked on using the first pages of this book, the earthy tones really give it that vintage feel that I wanted.  EVERY SINGLE Paint used in this piece is from my favorite place, let’s say it together…HOME DEPOT!  They are all textured or metallic samples of Martha Stewarts line of paints.  The metallics are amazing and the textures range from crackle paints to the dark brown which you would swear is gritty mud smeared on the canvas with a knife….I also used some texture tools I got at the train show as well, a metal bristled “toothbrush” meant to clean track, but makes great texture in molding paint etc.  So for around five dollars a piece you get some great new textures and colors in good sized bottles that last a long while.  So here is the piece with a close up of the pages out of the Train Log along with an image that reminded me of my grandmother…..


Don’t forget to visit me on Facebook and Like Hummingbird Studios Page and follow us on Twitter OR sign up for our newsletter to your right.  You’ll get a free transfer technique and Monthly updates  and tutorials from Hummingbird Studios.  As always, peace and light to you and yours….WK

Happy New Year! Follow Along Beveled Canvas Project Part IV: Filling In the Squares and Choosing your colors

Hello again and I hope everyone is having a happy last day of 2011 and ready for 2012!

The next portion of this tutorial is the bulk of filling in the canvas but is also the easiest and the hardest at the same time.  This is where you choose your colors and how they are going to compliment your sketched out composition.  There are Three parts to this.

  1. taping and painting in

  2. spraying (optional)

  3. going over your textured areas again with oil pastels before moving on to the final step and details

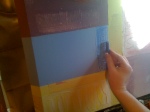
So step 1.  filling in your pre-sketched out composition with colors.  Now I had intended some brighter colors but I found these great testers at Home Depot for $.50 each in pastels and I fell in love with them.  So I decided to go with softer colors for the main areas and then in the last step I’ll bring in brighter colors for pop and detail as you’ll see in the next post.   I tape off areas using painters tape and then paint the areas.  BUT THE MOST IMPORTANT PART is WIPING THE PAINT AS YOU GO WITH PAPER TOWELS TO LET THE PAPERS AND PHOTOS YOU’VE PUT UNDERNEATH SHOW THROUGH.  If you don’t wipe as you go you lose your under layer and a lot of character.  See below.  Please forgive the lighting I was working by my window in the middle of the day and the glare was terrible.

  • Tips: use a soft touch on your tape to avoid tearing under papers
  • be careful of drips, but to be honest the occasional drip of color here and there can be a nice touch

This slideshow requires JavaScript.

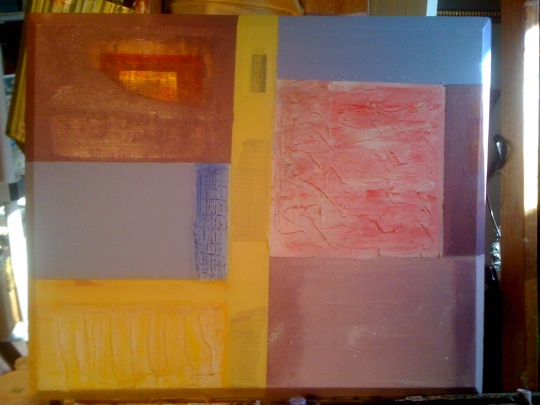
Step 2.  Choose certain blocks to spray watered down paint or India Ink or even Tea on.  I have watered down white paint in a travel size hairspray container and I used it on my purple blocks.  Have fun with this but don’t go overboard, it should be used sparingly!

 Step 3.  To finalize this section I take oil pastels that are darker than the paint and rub it on my textured areas to create a “Pop” and get it ready for the next and final step.


 So Here we are at the end of the fourth tutorial and this is where the piece is standing.  Remember we have one more very important tutorial to finish up the piece and you’ll be amazed at how such a simple step finishes off the piece so so nicely.

Remember if you Like this post or want to share it please do so below but most of all I would love to see pictures of your work if you are following along to share with our friends that also read this blog, so send them in!!!!  Don’t forget to visit me on Facebook and Like Hummingbird Studios Page and follow us on Twitter OR sign up for our newsletter to your right.  You’ll get a free transfer technique and Monthly updates  and tutorials from Hummingbird Studios.   As Always Peace and Light from Hummingbird Studios and a Phenomenal New Year!

Where will I be in the next month in person and another thrifty way I’m getting there thanks to my biggest fan…my hubby!

Click for my info under 2011 Artists! Nov 5-6

October 8th I’ll be at HandleyFest for One Day only…A short drive to Fort Worth! Come by and see me!

November 5-6 I’ll be in Winnsboro Texas for Winnsboro Fine Art Fest click above for the website with maps etc.   Only an hour and a half from DFW for a great day of art and fun. Come and stop by my tent!

Don’t forget to bring your coupon for 10% a purchase of $100 or more.

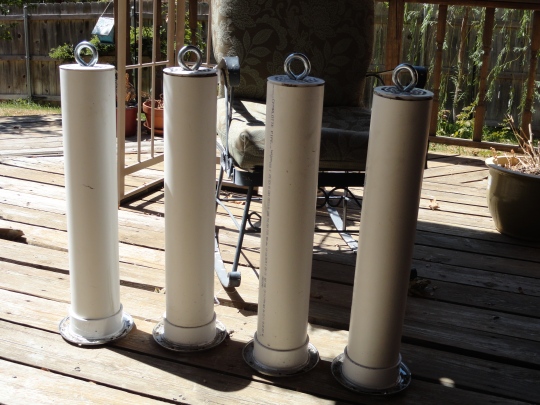
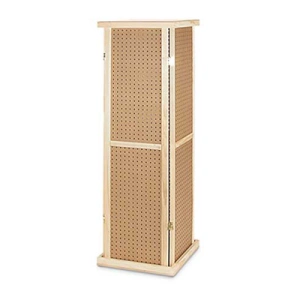
We’re still working on thrifty ways to do these shows and my amazing husband has built an incredible pegboard screen for me to hang goodies from and made these weights by hand using pvc pipe and concrete….I’m thinking my tent’s not going anywhere…we hope so at least! Here’s the website with full directions on making these weights.  Now did my husband follow these exact directions….NO of course not….he’s a man he doesn’t need instructions….but the weights turned out great anyway even without following the instructions….he cracks me up, but I couldn’t complain much.  He’s been my right hand man slash biggest fan in this entire journey from selling on the internet to selling at fairs so His support is enough to make any woman feel like a princess.  I’m extremely blessed!!  So here’s a pic of our weights and the link with instructions….

 The pegboard wall is almost finished and will be in my next post.  I’m in love with it…..picture chinese folding screen in a pegboard that is completely collapsible for easy transport.  Who knew what a CPA coul do with his hands!!  Hope to see you there and soon, peace and light to you and yours, WK.

Why do I feel like I’m in Kindergarten again? And More ways to save at Home Depot!

Logo for The Home Depot. Category:Brands of th...

Image via Wikipedia

First Squares themes in my work, then triangles and now I’ve move up to the elusive CIRCLE…. This was sosoooooo much fun!  The brown is a paint Sample from Home Depot, Martha Stuart Collection called Potting soil and now I know why…they texture feels just like rough dirt when paint smoothly or with a knife, I used both methods.  it cost me 5$ at Home Depot and will last forever, so check out the paint sample section that people use to “try out” paints on their walls to see if they like it or not, and DON’T forget to look at the remnant bin where all the “mistakes” go and you can get a gallon of paint for $5!!

So here’s my newest “work” which I hate to call my pieces “Work” because I have so much fun doing them!!  This one was a blast.  Think I might play with circles for awhile…..just like the good old days in the sand box….”dirt” paint and all!!

                                                                         This piece for sale at Art Span and prints available at Red Bubble

As always if you Like this piece click “LIKE”, if you want to comment…great, but most of all…say it with me…..HAVE FUN AND CREATE (and get a good bargain when you can)!!!  I’m all about the fun of the hunt and the lower the price tage the better and the better the secret “location” is….even better because that means I can share it with you!!  So Have fun and don’t go broke doing it!! Peace and Light  WK

The Frugal way to start showing at Art Festivals: The Panels

OK, so we have our EZ up Tent ordered and even with WWW. WINDYKAI.COM on the awning all for under $250 compared to the expensive brand at well over $800

So now how do we display my art.  The big expensive, and very high quality way to go is through a company called Pro-panels.  They are beautiful, sturdy and extremely expensive for this little girl right now.  Here’s a good look at how nice they are.  And maybe one day I too will be able to afford the best..just not now….

This particular panel runs

  • 30″ wide $105

  • 38.5″ wide $120


It would take about 8 of these to complete a 10×10 tent equaling around $960….well, I don’t have an extra  thousand dollars lying around just yet…like I said, one day. 

BUT FOR NOW….here are some extremely easy, non expensive and attractive alternatives.

This gentleman used concrete support wire to hang his work on.  I would imagine this is a very cheap option at Home Depot.

This tent used all pegboard that runs about 6 dollars for a 4 foot sheet.

These Wire Mesh Panels are another option but run around $3-400  So I’ve decided to go with the next best thing….

SINGLE WIRE MESH PANELS…at Home Depot sold as Closet organizers for $10 for a foot and half panel leaving me to need around nine for a 10 x 10 tent costing less than $100.  We saw several booths at a recent show with these and they look fantastic.  $90 compared to $900…I”m pretty proud of myself…now are they pro panels…no…but for right now on our budget they will do just fine and look very nice until we decide to invest more.  Or, as many of the artists I spoke with at this recent festival, they love their mesh panels and wouldn’t have anything else.  So who knows?

Now for the center to hide the back doorway my handy dandy husband is going to building a little something like this….

With pegboard and S hooks you can do an awful lot and at $6 a sheet and some 2×2 boards along with some very pretty trim I found at home depot meant for home floor or ceiling trim we have a very nice looking, foldable, inexpensive and very versatile additions to our tent.

So I’ve been thinking, how am I going to pull these wire mesh panels and this peg-board wall into a booth that will draw people in…well I have the perfect idea and it goes with all the things I love and adore….All things Old…so you’ll have to wait until next time to hear how we’ll pull the decor together along with lighting and much more.

Thanks as always for reading, you are so special to me and to share the process with you is extremely cathartic and is helping me get ready in my head and get organized in the reality.  Our tent is ordered and shipped, when it arrives and we practice putting it up I’ll let you know the hilarity that will no doubt ensue.

Until then don’t forget to comment, share on Facebook or click Like.

Peace and Light to you…Windy Kai

The Little Things

Oh, it just doesn’t take much to thrill me I guess!  But it is the little things isn’t it?  They are the only big things there are…

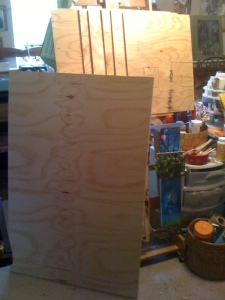
Remember how I told you I loved to visit home depot and look at their remnant section in lumber for substrates in leu of canvas?  Well, yesterday I hit the jackpot and got 6, yes 6 perfect canvas size pieces all for $.51 cents a piece AND 2 very Large boards which thrills me because I’ve never worked on such a large scale so now I have the opportunity to do so with these two pieces!  AHH!!  I’m so excited!!

And yes I know some of you are saying….”it’s just wood Windy” but to me…it’s magic! (not to mention cheap!!)

Don’t forget to sign up for my newsletter to get blog updates and other goodies like immediately you’ll get a free PDF of my favorite tranfer technique.  So sign up in the top right corner!  We would love to have you as part of the family and your information is ALWAYS secure.

Have a great week everyone…Peace and Light…Windy Kai

IF there’s paint left in that brush…USE IT! 3rd Tip for Multi-Tasking Multi-Media Artists

OK so let’s recap…..Multi-tasking as a Multi-Media Artist!

1. Just because it’s pretty doesn’t mean it’s practical… 

2. Get out the duct tape and divide up that room….If you can’t see it you won’t use it…Out of sight out of mind… Collage Lab by Bee Shay

OK today we’re on number 3 of Multi-tasking as a Multi-Media Artist

3.  If there’s paint in that brush use it!!  Waste not, Want not….With Art at the Speed of Life by Pam Carriker

Forgive the Silver Patron shirt in the video!  I won’t lie…it’s one of my favorites!!!

  • Things you’ll learn in this video…
  • 1. Creating a Substrate
  • 2. Book: Art at the Speed of Life
  • 3.  Why Home Depot is the coolest store ever for under-funded artists
  • 4. How paper towels can be so cool!!
  • 5. Don’t put that brush in water until it is as empty as it gets! 
  • 6. And you don’t have to always use expensive products to do the cool projects in these great books!


IF there’s paint in that brush USE IT!!


A substrate I’m working on for Art at the Speed of Life…love the background, we’ll see what the foreground has to hold!! But I didn’t waste an ounce!!